One of the things I'm most proud of is that Urban Contessa's handmade napkins have mitred corners.
It's much more time-consuming than the corners you see on mass-produced napkins, but the end-result is beautiful and, quite frankly, I'm a firm believer in "if you're going to do something, do it well". And right.
And mitred corners are right.
But people who sew, are interested. And they ask me how to sew mitred corners. In the past, I've directed them to various tutorials on the Web, but I think it's time I create my own "how-to" blog post.
A co-worker ordered eight napkins, so I took this as a sign (and the perfect opportunity) to do my tutorial.
So, here we go...
Urban Contessa's napkins are 20" x 20". To yield eight napkins of this size, you will need two and a half metres of fabric. I like to use Galaxy Twill (shown in this post), or broadcloth.
Start by cutting a 21" x 21" square.
Using a 1/2" seam allowance guide, fold over each edge and press.
Fold over the seam allowance once more and press. This leaves a nice clean edge.
Unfold the second pressed seam to the first fold.
Fold down the corner, at the point where the seams meet.
It's not very clear in this photograph, but you can use the pressed lines of the seams and line them up with the cut edge of the first seam allowance fold. Press the corner.
Open the pressed corner, then fold the corner of the napkin, right sides together, into a point. You will see the pressed line from the folded corner.
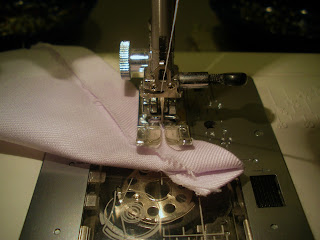
Sew along the pressed line. I like to place the napkin in the machine with the folded edge toward me.
Cut off the excess fabric.
Turn out the corner using a point turner to get the point nice and sharp.
Press again.
Close the seam with a topstitch.
Look at that. Isn't that pretty?
Press one last time.
And now we're all ready for sale.
As I said, it's time consuming, but the end result is worth it.
Now that you know how to sew mitred corners, you'll become a corner snob. Whenever you're out, and have a meal with a cloth napkin, you'll check the corners. And when you see those cheap folded-over corners, you will snort your derision.
Welcome to the Corner Snob Club. I'm the President.


